

Non è stato facilissimo, su alcune unghie ho dovuto ripetere l'applicazione.

Ho usato:
I used:
dotter and toothpick or something pointed
scotch tape
2 nail polishes
base and top coat
cup with room temperature water
To reduce mess and clean up, I tape my fingers before marbling them.


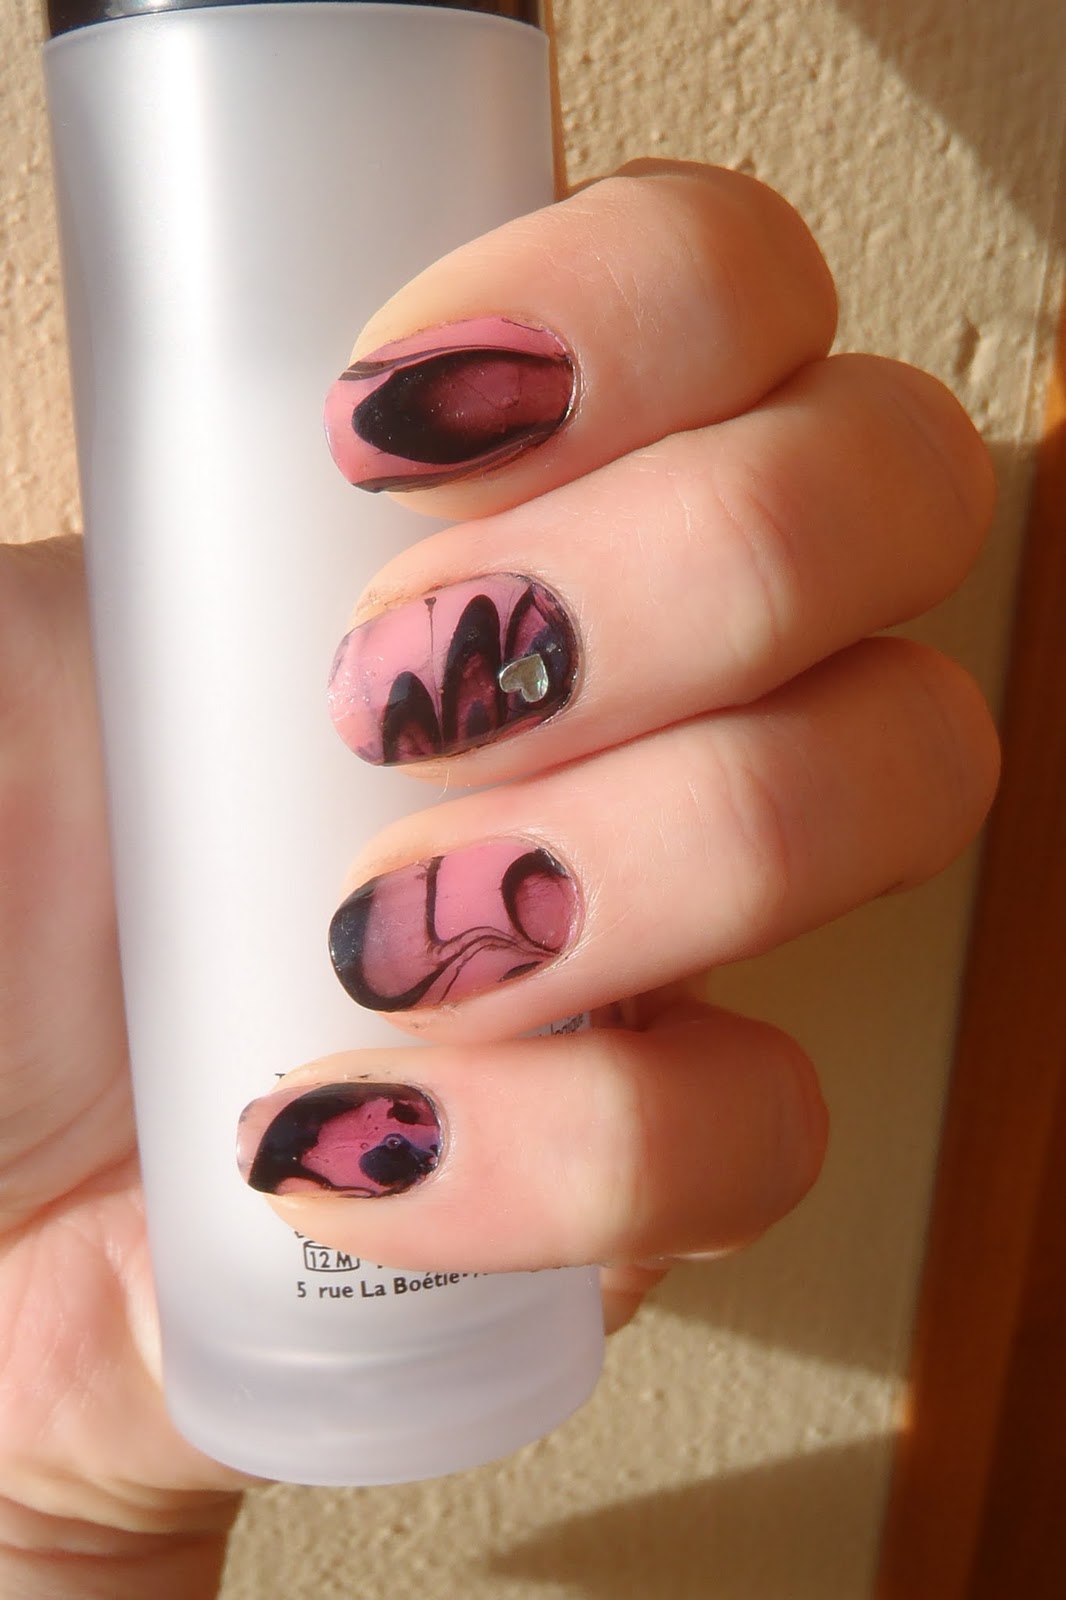
Then, in the middle of the violet nail polish I drop the other nail polish (a pink one, 308 by Pupa) and I continue alternating them until I have 5-6 concentric circles.

Using a dotter, I drag through the polishes from the edge toward the middle until I create a design.


I position my fingernail above the part of the design I like and I dip it.


I put my finger out of the water and I let it dry. then you can remove the tape.

In queste due foto potete vedere come è importante che siate precise nell'applicare lo scotch, infatti nella seconda foto dove l'ho semplicemente rimosso, senza aver ancora usato l'acetone per correggere gli errori, potete vedere che è il dito praticamente pulito.


I've discovered this technique on youtube long time ago, I found it very beautiful and so I've decide to try it for the first time.
It wasn't easy, on some nails I'd had to repeat the application.

tazza con acqua a temperatura ambiente
scotch
dotter e stuzzicadenti (o qualcosa di appuntito)
2 smalti
base e top coat
dotter and toothpick or something pointed
scotch tape
2 nail polishes
base and top coat
cup with room temperature water

Per evitare di sporcare troppo i bordi delle unghie, le contorno bene con dello scotch.
To reduce mess and clean up, I tape my fingers before marbling them.

E' importante non usare degli smalti troppo densi, perché nè si formerà la goccia troppo facilmente, né si espanderà e se siete troppo lente, lo smalto si secca e non riuscite a lavorarlo.
Lo smalto nero (704 della Pupa) che ho usato era troppo denso (non è vecchio, al massimo ha 3-4 mesi) e non l'ho usato per fare il foto-tutorial (e non lo userò più per questa tecnica) proprio perché perdevo tempo a fare le foto e si seccava.
Ho usato al suo posto uno smalto viola (Tempest della China Glaze), che nemmeno mi sento di consigliarvi troppo per questa tecnica, perché risulta molto trasparente.
It's important not to use tick nail polish, because it will be difficult that forms a drop and that espands; if you aren't fast, nail polish will dry out and you can't work it.
The black nail polish I used (704 by Pupa) is too thick (it's not old, I've bought it about 3-4 months ago) and I didn't use it for the photo-tutorial (and I'll never use it anymore for this technique) because I lost time for making photo and the nail polish dried.
I've used a violet one (Tempest by China Glaze), but I not even feel to recommend you it for this technique, because it appears too transparent.

Step 2:
Faccio cadere da vicino una goccia di smalto viola, che piano piano si allargherà.
I drop with the brush of polish one drop of nail polish into the bowl of water. The nail polish should slightly spread out in the water.
I drop with the brush of polish one drop of nail polish into the bowl of water. The nail polish should slightly spread out in the water.

Step 3:
Più o meno al centro dello smalto che si è espanso, metto la goccia dell'altro smalto (un rosa, è il 308 della Pupa) e continuo così alternandoli fino a fare 5-6 cerchi concentrici.

Step 4:
Con il dotter, partendo dall'esterno verso l'interno, traccio delle linee, creando un disegno.


Step 4:
Immergo la mia unghia nel punto del disegno che più mi piace (uso un'unghia finta, perché era difficile fare le foto nel mentre).
I position my fingernail above the part of the design I like and I dip it.
(I use a false nail, because it's not easy to do the nail art and meantime make a photo).

Lasciando l'unghia immersa, con uno stuzzicadenti pulisco il residuo in superficie.
I let the finger in the water and I clean up all the unused nail polish with a toothpick.

I let the finger in the water and I clean up all the unused nail polish with a toothpick.


Step 5:
Tolgo l'unghia e la lascio asciugare per bene prima di applicare il top coat (io non l'ho fatto... infatti si vede!!! :P)
Lo scotch l'ho rimosso una volta finite tutte le mani.
Fine!!!
The end!!!

In these photos you can see that if you are precise with taping your nails, you don't have to go crazy cleaning your skin, in fact in the photo below I've only removed the tape, I didn't still use a nail polish remover and my finger is nearly clean.

Ciaooooo!!!


Nessun commento:
Posta un commento